Kubernetes is all the rage in the web developer world these days, and it’s gaining traction in the AI/ML community as well. Kubernetes is basically an engine that runs containers in the right place at the right time, accessible by the right entities…And containers are basically just individual, isolated programs with a whole lot of marketing hype. Simple enough, right?
This post describes how to get started as an administrator (not a developer) of a cluster from scratch. If you have a bunch of computers lying around at the office, and your development group is interested in trying Kubernetes without investing any money into it, this post is for you.
I assume you are familiar with Docker–that you’re able to install it and start, stop, and remove containers. I also assume you have very little exposure to Kubernetes but at least understand its purpose.
Creating a cluster is surprisingly straightforward. The gist is this:
- Run a Docker container with the
rancher/rancherimage (this serves as the “head node”) - Perform basic setup of any nodes you want in a cluster, to the point where you have Docker installed and can SSH in
- Create a new cluster via the Rancher GUI
- Copy/Paste a
docker runcommand from Rancher to each of the nodes - Download your Kubernetes config file from Rancher and set up your local machine to use it
Head Node Setup
The head node does not need to be a powerhouse; its job is just to tell nodes what to do, and they do the heavy lifting. Once you’ve picked a suitable, low-resource machine, install Docker and run Rancher on it:
docker run \
  -d \
  -p 80:80 \
  -p 443:443 \
  --restart=unless-stopped \
  --name rancher-v2.4.4 \
  rancher/rancher:v2.4.4
Rancher is a free, open-source Kubernetes head node solution. There is no paid option for it, but you can buy commercial support. v2.4.4 is what was out at the time of writing. Take a look at Docker Hub to find the right tag. I highly recommend including the specific tag and not just using “latest”; it will make upgrading far, far easier in the long run.
Once it’s running, navigate to the IP address of the machine that Rancher is running on and go through the setup. You’ll have to accept a self-signed certificate, which is fine for testing.
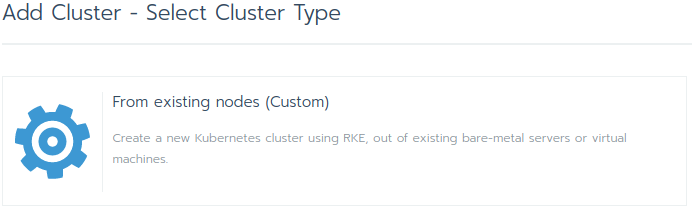
When logged in, click the blue Add Cluster button on the Global page:

Then select the “From existing nodes (Custom)” option:
On the next screen, simply give your cluster a name, and then scroll to the bottom and hit Next.
It will take you to a screen with instructions for adding a new node; you’ll see checkboxes for the roles of the nodes:
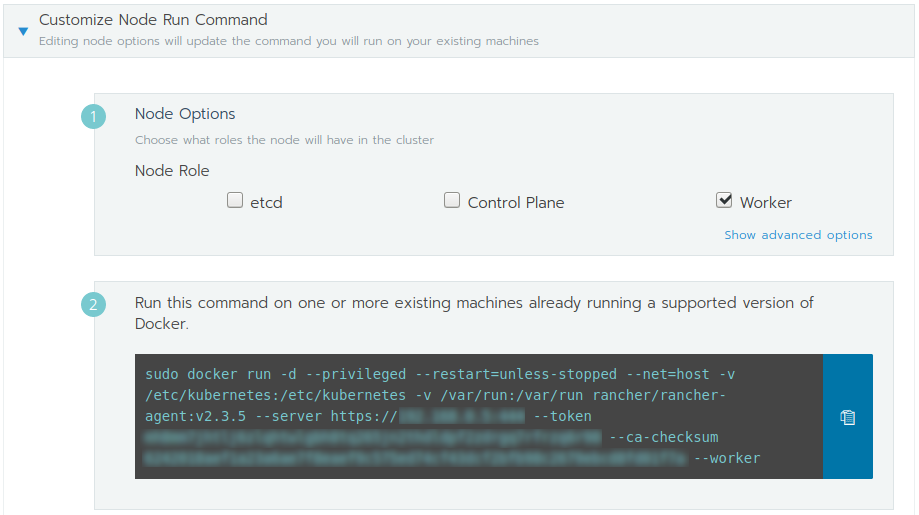
(I’m running a slightly outdated version of Rancher, hence the agent being stuck on v2.3.5. I should update!)
At this point, you’re done setting up the head node! The next step is to setup your cluster nodes and paste that command into them.
Setup Cluster Nodes
A good, healthy number of nodes to start with is three. You can technically run a cluster with one or two just fine, but the point of Kubernetes is to scale out and pool hardware resources into a single logical unit as much as possible.
Once you have your nodes set up with SSH and Docker (sudo apt install docker.io), go back to the head node, select all three checkboxes (etcd, Control Plane, and Worker) and then copy/paste the command via SSH into each node. You’ll see an indicated on the Rancher page that new nodes have registered.
This is where it gets a bit nerve-racking. Rancher has a tendency to indicate that things are going terribly wrong, when that isn’t the case at all. It has to do with the Kubernetes philosophy: say (“declare”) how you want to world to be and let Kubernetes handle the rest. When you add a node, you basically say that you want all kinds of things done with certificates, networking, storage on the node, control plane redundancy, etc. But none of those things are done at first, so Rancher indicates that there are big problems with the setup. Rest assured that Kubernetes is on the job, though, and eventually you should see the warning messages on the Rancher page go away.
When all is said and done, your cluster will show the nodes on the Nodes tab:
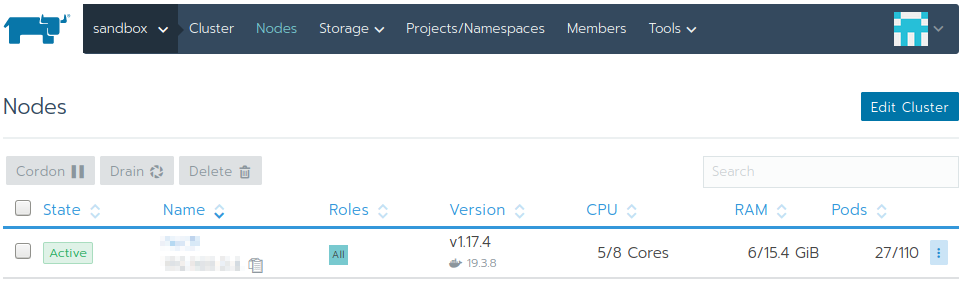
You now have a real Kubernetes cluster! Time to test it out.
Client Setup
This guide is focused on administration of the cluster, not development, so only the most basic kubectl tool will be installed. The cool devops and system integration people will want to look into things like helm, skaffold, the krew plugin manager for kubectl, and many others, but we’ll just keep it simple for now. On Ubuntu, run:
sudo snap install kubectl --classic
You now have the kubectl command, but before you can use it, you’ll need to grab your cluster config from Rancher:

Save the file to ~/.kube/config.
Now, try running something simple:
kubectl get pods
If you get the message No resources found in default namespace, then congratulations! The cluster correctly reports that the default namespace is empty, and you’ve just set up a Kubernetes cluster and successfully communicated with it–all without paying a dime for training or overpriced cloud instances! Even though this is just the beginning, you’re well on your way toward mastery already.
Some possible next steps, in no particular order:
- Get a few others from your dev team on the cluster! Create Rancher accounts for them, and add them to the cluster. You’ll need to also add them to the
Defaultproject on the cluster for them to use thedefaultKubernetes namespace. Help them set upkubectland do what you just did. - Run a simple pod on the cluster:
kubectl run ubuntu --image=ubuntu --rm -it -- /bin/bash. Once you’re in the pod, install theipcommand withapt update && apt install -y iproute2. Poke around at the network setup (ip a,ip route, etc.) to learn about it. - Create an HTTPS-secured version of the Rancher container, using a real DNS name and Let’s Encrypt for certificates. The paths for the cert and key inside the Rancher container are
/etc/rancher/ssl/cert.pemand/etc/rancher/ssl/key.pem, respectively. You can bind-mount certs from the host into the container. You’ll need to add--no-cacertsat the end of yourdocker runcommand when starting Rancher, to prevent it from creating its own certs.
Now go become a Kubernetes expert, and don’t let the pros scare you with technical jargon–in the end, all Kubernetes does is abstract your hardware away from your developers for convenience and, ideally, portability!